Konami Code Necklace


Up up down down left right left right B A Start… Who of a certain age can forget that code? I make no guarantees that this laser-cut mirror necklace will get you extra lives, but it will get you some extra attention.

Since there isn’t a whole lot to share in the how-to of the final product, instead I thought I’d share the meandering process of getting there from the initial idea. So often, project write-ups only focus on what worked and ignore the many failures and missteps along the way, and there were many failures and missteps in this project, spanning over a year.
The original idea wasn’t for a necklace at all, but for vinyl stickers. I’d bought a Silhouette Cameo paper/vinyl cutter and was looking around for projects to put it through its paces. The idea of a Konami code vinyl decal for a bike or car appealed to me, so I took a photo of a Nintendo controller, imported it into Adobe Illustrator, traced the words and arrows, and then sent it to the cutter.

Tracing text from the NES controller. The lines I’m drawing are yellow.
I made a half-dozen of the vinyl decals for various friends. The cutter is great, by the way, and I recommend it to anyone interested in papercraft.

A Konami code decal on a friend’s bicycle.
Not long after, I thought to myself “I’ve got the shapes already, and that’s the hard part. Some jewelry would be cool too.” Oh, how naive I was about what the hard part really was. But if I knew what a project would really entail, would I even start half as many as I do?
My first experiments were with laser engraving on black acrylic (using ponoko.com), the idea being that I could fill the engraved areas with paint. I tried both hand-painting the engraved area and using the protective paper on the acrylic as a mask for spray painting. Neither was as successful as I’d hoped, and even if they had been, too much effort was required for each one.

Reluctant to give up the idea of using colors that matched the controller, I put the project on the back burner for months while I thought about screen printing and other possible solutions. One night, though, I saw a friend with a monogram necklace laser-cut from mirror acrylic. Aha! You never know when an answer will find you, as long as you keep yourself open to it. The necklace wouldn’t be faithful to the original controller colors, but it would be oh-so-shiny!
I ordered some test cuts of various styles, some engraved, some outlined, and some cut completely out. I also made some with holes cut for jump rings, and others without—planning instead to glue a bail to the bead.

Some of the mirrored versions I didn’t use.
The best looking version was the one fully engraved, but the problem with using a jump ring on a chain was that all of the beads crowded and covered each other. Another bump in the road, another month of turning it over in the back of my mind during the occasional idle moment.

This isn’t going to work.
What if I didn’t cut a hole perpendicular to the face, but instead parallel to it? The laser cutter couldn’t do that, but I could with a drill press.
I sent another batch to be cut without holes, along with some jigs to hold the beads in a repeatable position for drilling.
When they arrived a week later, I used double-sided tape to hold the jig to the vice on my mini milling machine. I could line up the bit, lock the X-Y table in position, then pop a bead in place, drill, remove it, and repeat.
![]()
That worked great for the small round beads, but the jig for the “Start” bead had too much flex and I ruined two before I gave up and tried a new method.

So instead I lined it up against the edge of the vice. The straight edge of this larger bead let me do this, while it wouldn’t work for the round beads.

Drilling done, I threaded the beads onto a wire. The overlap problem wasn’t as bad, but it was still there, and it still wouldn’t work.

Crowded beads, still wearing their protective paper.
I did some complaining to my jewelry-making friend Katherine, and she suggested spacer beads between each. If you don’t know what you’re doing, talk to someone that does. I found small metal tubes, and they worked perfectly!

With everything drilled, the first step in assembly is to thread the magnetic clasp on and crimp a loop.

Thread the beads and spacers on, and crimp the wire into a loop to hold the other end of the clasp.

Finally, peel the paper that protects the acrylic during production and shipping.


If you want the shape files of the arrows and words for yourself, you can download an EPS here to use them in your own creation. I only ask that you mention my blog and link back to it.
Leave a comment
Comments will be approved before showing up.
Also in Projects

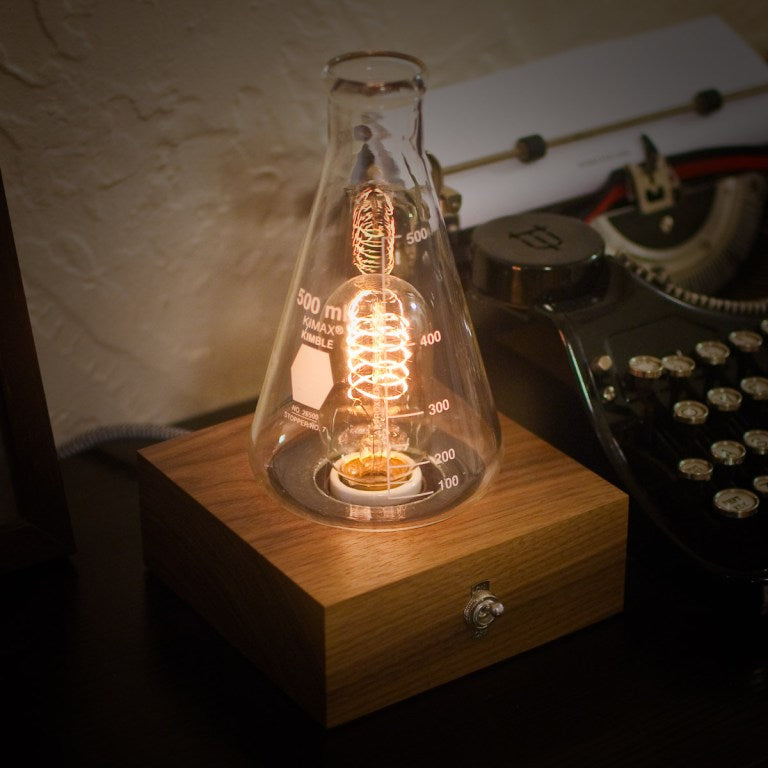
The Laboratory Lamp
First created in 1860, the Erlenmeyer flask has come to symbolize chemistry, and by extension science as a whole. I wanted to use that symbol to create an item of functional decor, and what better for that than a lamp, with the relationship between the light bulb and the “aha!” of an idea?

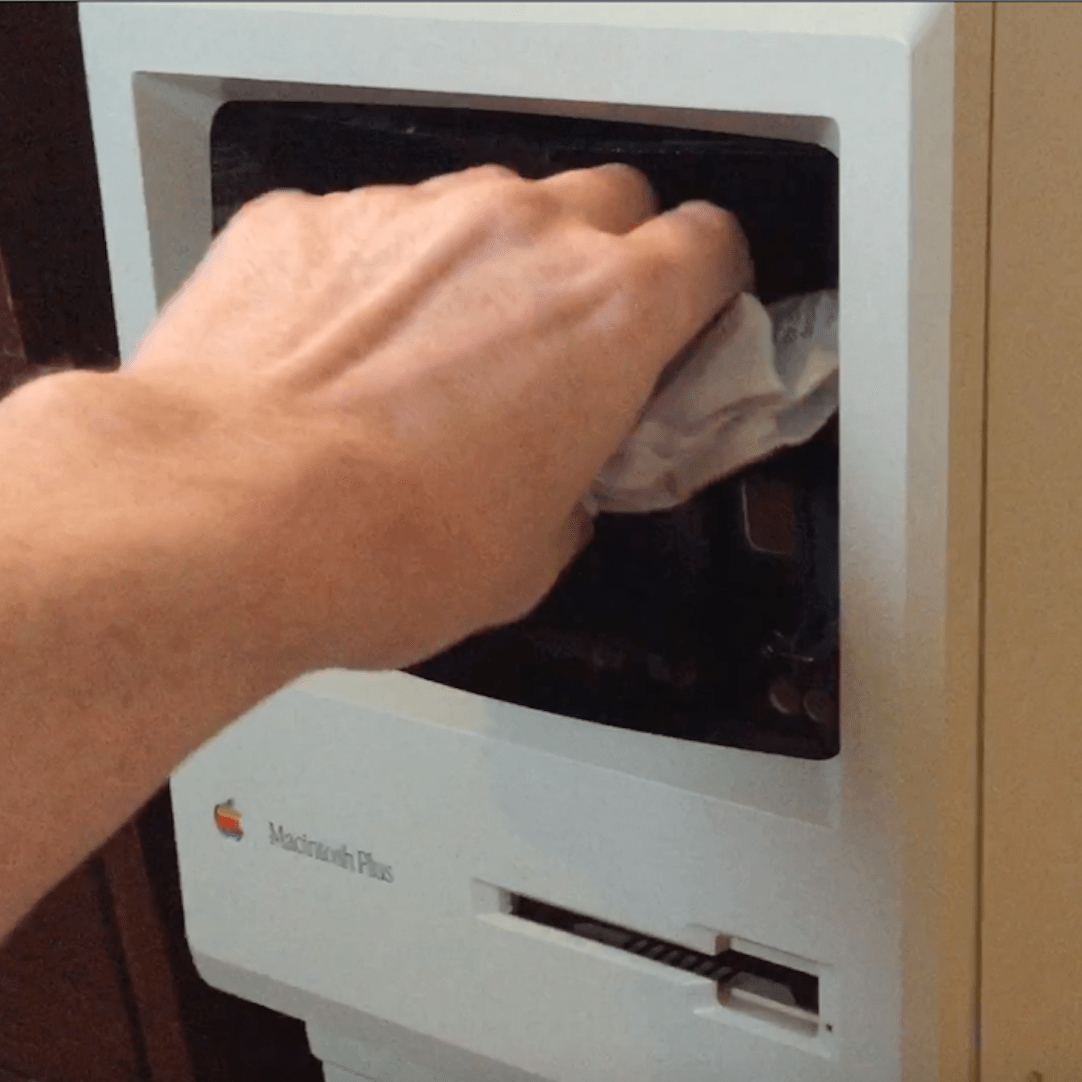
Garbage In, Garbage Out
For over a decade I’ve had kicking around in my garage’s attic the cases from a couple of old original-style Macintoshes, waiting for just the right project.
One day, after staring at them stacked in my office, I realized that they had a similar form factor to the classic bullet-top garbage cans with the swinging lid. I could give one of these a new (slightly unceremonious) life as a garbage can!

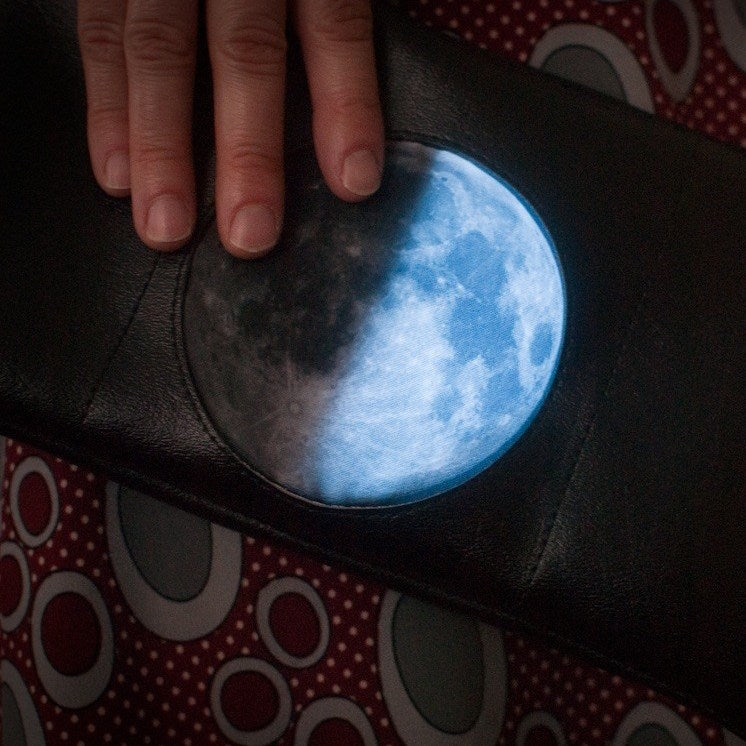
Moon Phase Purse
I’ve been going through a moon phase recently (pun absolutely intended), and thought it would be fun to make a wearable or totable that displayed the current state of the moon. There would be a bit of hardware involved, so a purse seemed like the perfect vehicle—you’re already carrying a load of other things, so there’s no harm in the addition of a small battery pack or a pile of LEDs.