Moon Phase Purse

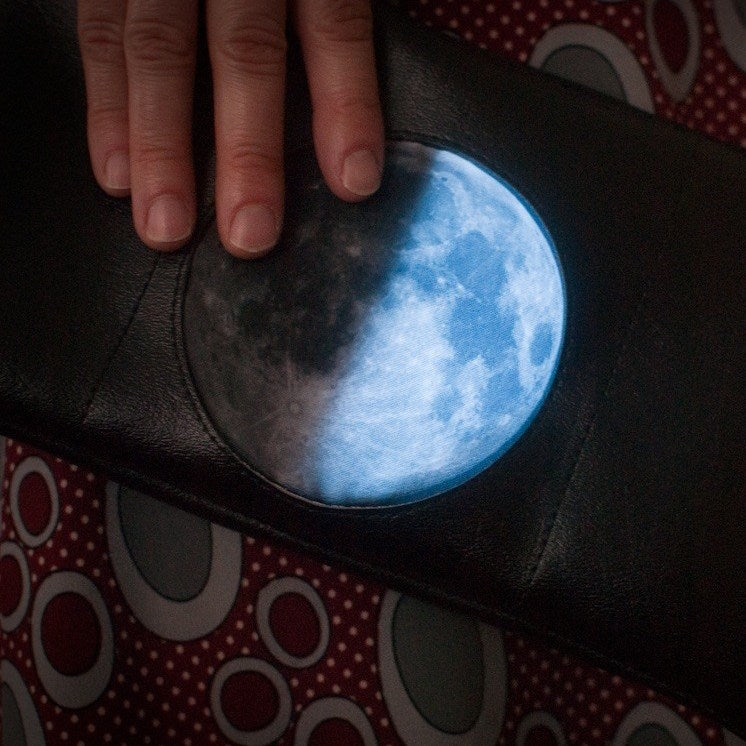
I’ve been going through a moon phase recently (pun absolutely intended), and thought it would be fun to make a wearable or totable that displayed the current state of the moon. There would be a bit of hardware involved, so a purse seemed like the perfect vehicle—you’re already carrying a load of other things, so there’s no harm in the addition of a small battery pack or a pile of LEDs.

I experimented with matrices of LEDs turning off and on in the right places to show the current phase, but it didn’t have the precision I wanted—you could still see the individual pixels. What I realized would work, though, was an EL panel and a mask. I also thought about a segmented EL panel, but that was more complex than I wanted to deal with.
For the moon, I uploaded and ordered a custom print of the full moon from Spoonflower on a lightweight fabric. I was able to fit nine moons onto one sample-sized piece of fabric, so I had spares in case I goofed up (and I goofed up plenty of times).

For the template I ordered laser-cut black Delrin from Ponoko, and for the bag itself I chose black marine vinyl from the local fabric store. Electronics came from Adafruit and Sparkfun.
First, I used a circle cutter to make a hole in the vinyl the same size as the moon on my fabric.

I taped the moon fabric to the back of the vinyl, then carefully sewed as close to the edge as I could. It took three tries, but I finally ended up with a result I liked.

I would need a pocket to hold the moon phase templates and the EL panel against the back of the fabric moon, so I stitched another piece of vinyl to the inside. I continued the stitch all the way up the length of the vinyl as a decorative element. To form the bottom of the pocket without requiring extra stitches, I used a piece of athletic tape (not pictured).

The fabric lining of the bag required a zipper that would allow you to switch out the template, so I sewed that into a piece of fabric reminiscent of a star field.

From there it was just a matter of sewing the external zipper into the vinyl and assembling the pieces, then turning it right side out. Here are a few pictures, but I’m not going to go into all the detail of what to sew and how. Find a pattern you like and adapt it.


With everything assembled, I inserted the panel and inverter/battery pack, then stitched shut the opening left in the lining through which the clutch was turned right side out.

It worked, and looked great! The inverter made a slight whine, but closed into the bag you couldn’t hear it unless you listened in a quiet room.

Leave a comment
Comments will be approved before showing up.
Also in Projects

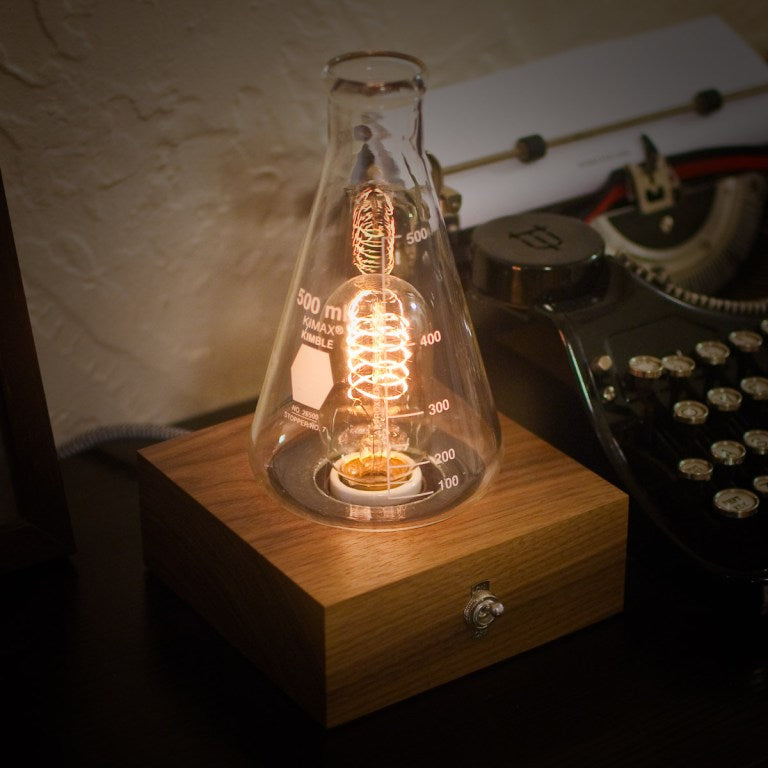
The Laboratory Lamp
First created in 1860, the Erlenmeyer flask has come to symbolize chemistry, and by extension science as a whole. I wanted to use that symbol to create an item of functional decor, and what better for that than a lamp, with the relationship between the light bulb and the “aha!” of an idea?

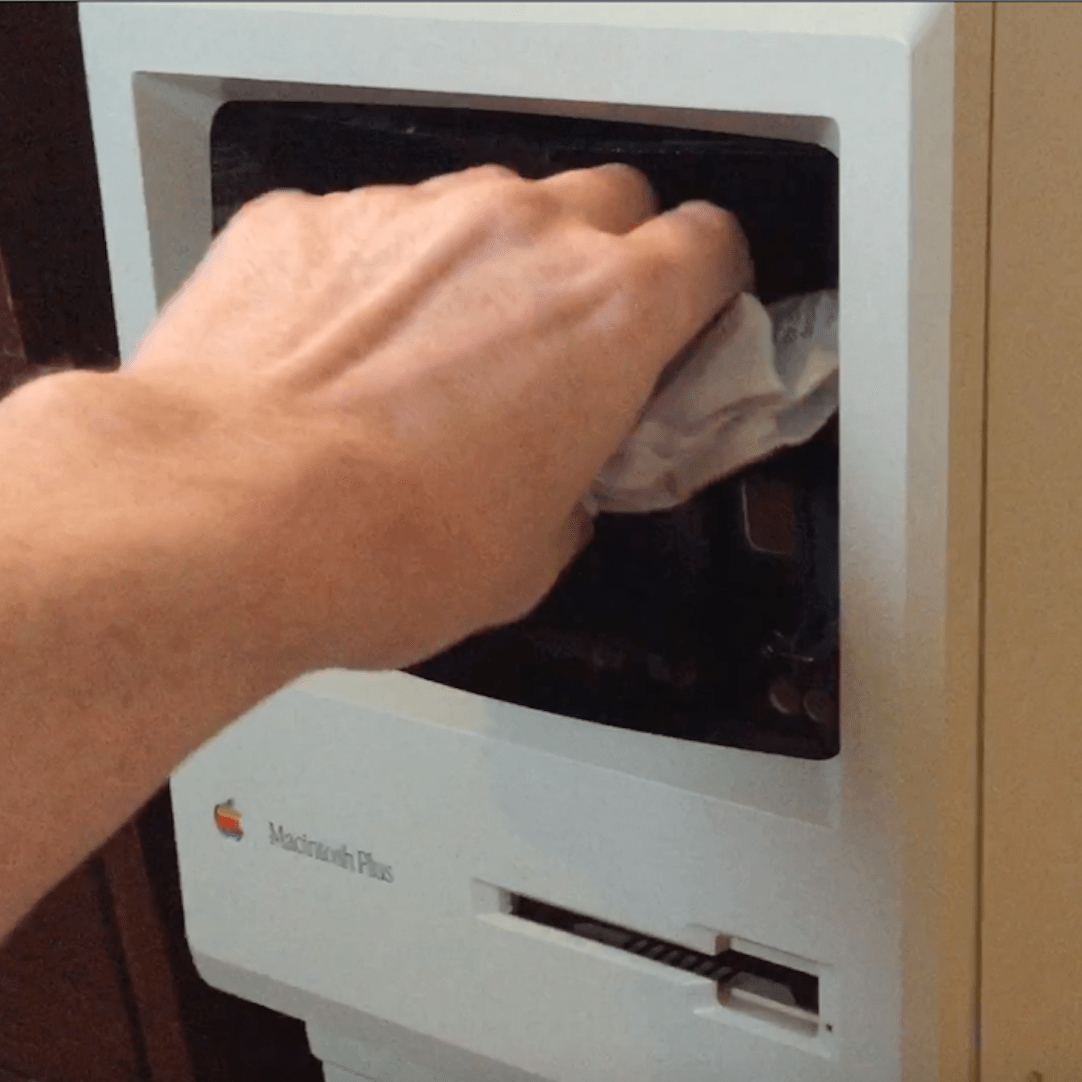
Garbage In, Garbage Out
For over a decade I’ve had kicking around in my garage’s attic the cases from a couple of old original-style Macintoshes, waiting for just the right project.
One day, after staring at them stacked in my office, I realized that they had a similar form factor to the classic bullet-top garbage cans with the swinging lid. I could give one of these a new (slightly unceremonious) life as a garbage can!

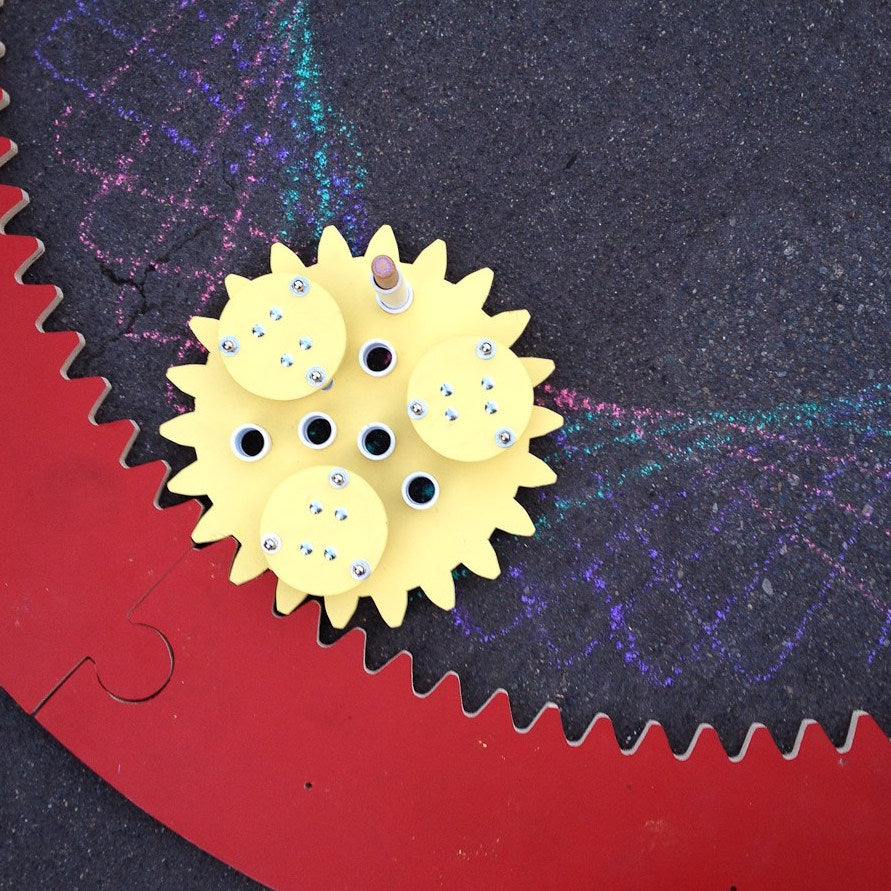
The Giant Spirograph
What’s eight feet across, has 90 teeth, and makes beautiful designs? Not a shark with an art degree, but this giant version of the classic Spirograph drawing toy. Chalk is the medium, and streets and sidewalks are the canvas.