Garbage In, Garbage Out

For over a decade I’ve had kicking around in my garage’s attic the cases from a couple of old original-style Macintoshes, waiting for just the right project. Fishtank? Nah, been done. Embedded Raspberry Pi and display? Maybe, but not now.
One day, after staring at them stacked in my office, I realized that they had a similar form factor to the classic bullet-top garbage cans with the swinging lid. I could give one of these a new (slightly unceremonious) life as a garbage can!

First, I built a simple box from 1/2″ birch plywood. 9-1/2″ x 9-5/8″ x 14″ tall. That seemed like a good height to go alongside my desk, and the other dimensions matched the base of the Mac. This would be the trash receptacle, and the Mac would be the lid.


I marked where the feet of the Mac would go on the top and drilled 1/4″ deep holes with a Forstner bit to accept them.


The box needed an opening for the trash to go into, so I drilled one-inch holes in the corners of a pattern I drew on the top—it’s easier and more accurate to use a large drill bit to cut a radius than it is using anything else. That done, I cut along each edge to connect the corners.


Plywood edges are rough, so I filled them with joint compound and sanded it all smooth.


With the box done, it was time to work on the Mac itself and figure out how to build a swinging door.
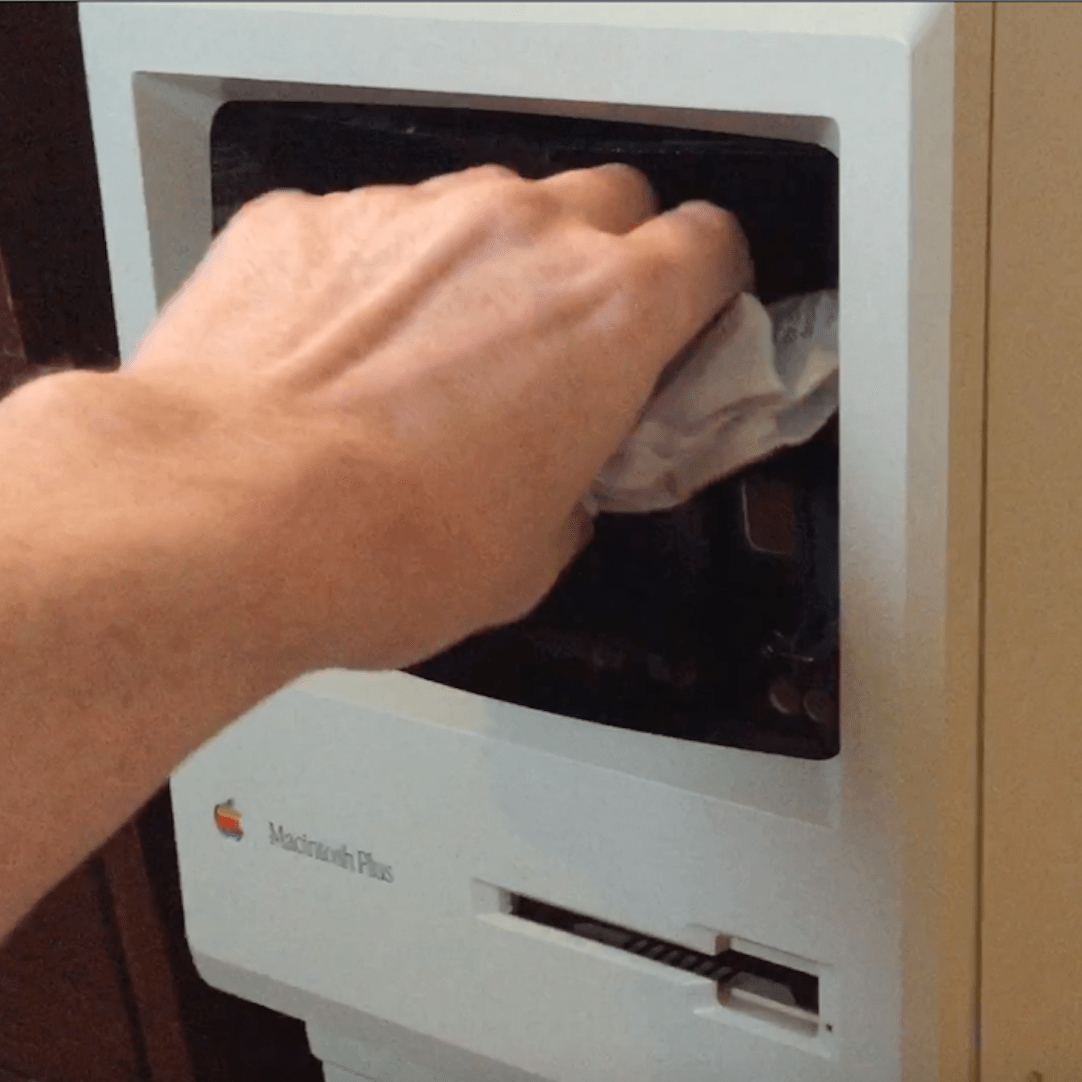
First I took the donor Mac apart. There are two T-15 screws in the recess of the handle. If it weren’t missing its internal parts and frame, there would be a few others around, too.


Trivia note: did you know that computer’s development team all had their signatures molded into the back of this and earlier models? Take a look!

The old 9″ tube of the Mac’s screen was curved, but the 1/8″ black acrylic sheet I planned on using for a door is flat. The gap between the curved bezel and the flat acrylic sheet bugged me, and I needed to close it one way or another. My first plan was to machine the bezel flat, so that the acrylic would sit flush.

I had the acrylic resting on the bezel while I estimated just how much would need to come off and how I would do it, when I pushed down on the center of the acrylic. It bent to perfectly fit!
Aha! Maybe I could soften acrylic in the oven, put it in the bezel, and it would mold itself to shape.
I did some research and found a recommendation that 300° F for 10 minutes per quarter-inch would get it soft enough to bend. I checked frequently after five, and seven minutes ended up getting the sheet just pliable enough. I set it in the bezel and it formed perfectly under its own weight. This was working much better than I had planned! From the front it looked exactly like the original monitor!

I cemented two pieces of 1/2″ thick acrylic to the back of the screen for the hinges to attach to. It was my first time using acrylic cement, and I used a little bit too much. It’s thin and acts on capillary action, so not much is needed at all. I, of course, did use too much and it capillaried (I’m making that a word if it isn’t already) itself right around my clamp and onto the front of the screen, ruining it. Fortunately, I had bought an extra piece and repeated the whole softening and shaping process.

When the cement was dry, I sanded the blocks parallel with the front panel rather than the curve of the screen. Hard to explain, but here’s an illustration:

I cemented the hinges to the screen,

then realized that they were too far inward and hit the case where the screws attached.

With a few seconds on the spindle sander I was able to grind part of the corner for it to fit, while still leaving enough of the hinge to attach.

I glued another block to the front of the case, with a height to match the hinge on the screen, and then glued the hinges. Patience was in short supply that night, though—I was so eager to test the door mechanism that I didn’t wait long enough for it fully dry and ended up popping it off. Whoops.

I hid it out of sight overnight so it could dry, and in the morning it worked!
The only real work left to do now was to cut a hole in the bottom of the computer’s case to match the hole in the bin. I drew the same pattern, then attacked it first with the jigsaw (no good, probably the wrong blade), the router (almost ran away and destroyed it all), a coping saw (too slow—I’m not patient enough), before finally settling on the Dremel tool with a cut-off bit. It melted more than cut, but it worked and the rough edges cleaned up easily with sandpaper.

I took the bottom that I’d cut out to the local hardware store and had them mix up a quart of paint to match.


This ended up as my only regret on the project, because it turns out that the plastic on the bottom of the case that I used as a paint sample wasn’t the same color as the plastic on the side. Being protected on the bottom, it wasn’t exposed to light and so it hadn’t yellowed in the same way as the rest. Not a big deal and you might not even notice if it weren’t pointed out to you, but I’m picky about these things.
When the paint dried, it was done! Time to throw things away!

To quote my friend Kirk in the voice of Steve Jobs: “It holds your trash… and we think you’re going to love it.”
Leave a comment
Comments will be approved before showing up.
Also in Projects

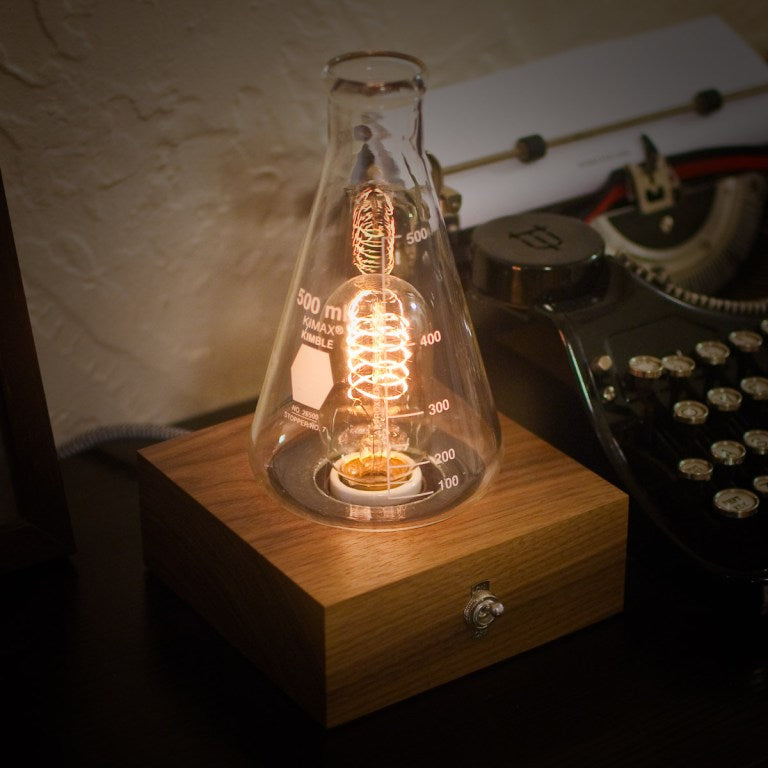
The Laboratory Lamp
First created in 1860, the Erlenmeyer flask has come to symbolize chemistry, and by extension science as a whole. I wanted to use that symbol to create an item of functional decor, and what better for that than a lamp, with the relationship between the light bulb and the “aha!” of an idea?

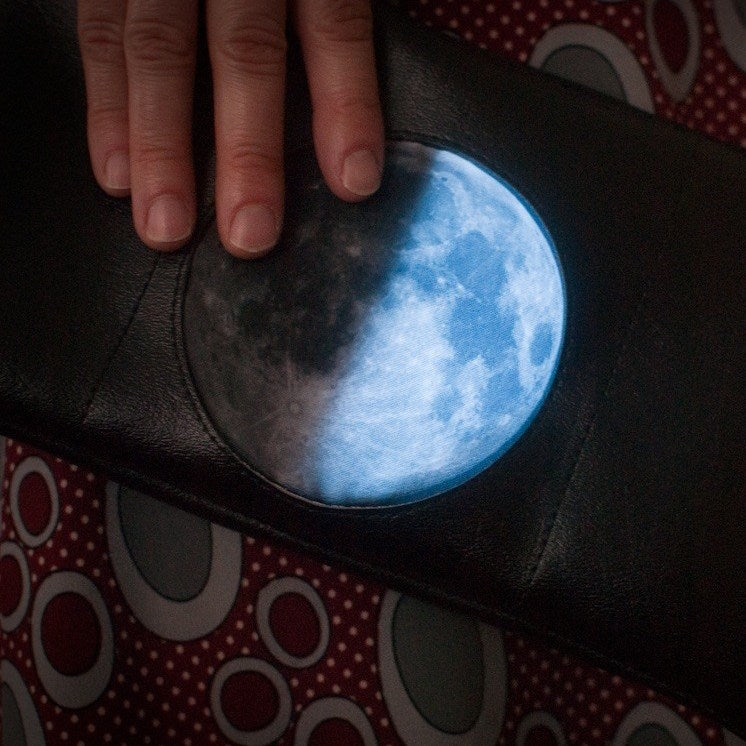
Moon Phase Purse
I’ve been going through a moon phase recently (pun absolutely intended), and thought it would be fun to make a wearable or totable that displayed the current state of the moon. There would be a bit of hardware involved, so a purse seemed like the perfect vehicle—you’re already carrying a load of other things, so there’s no harm in the addition of a small battery pack or a pile of LEDs.

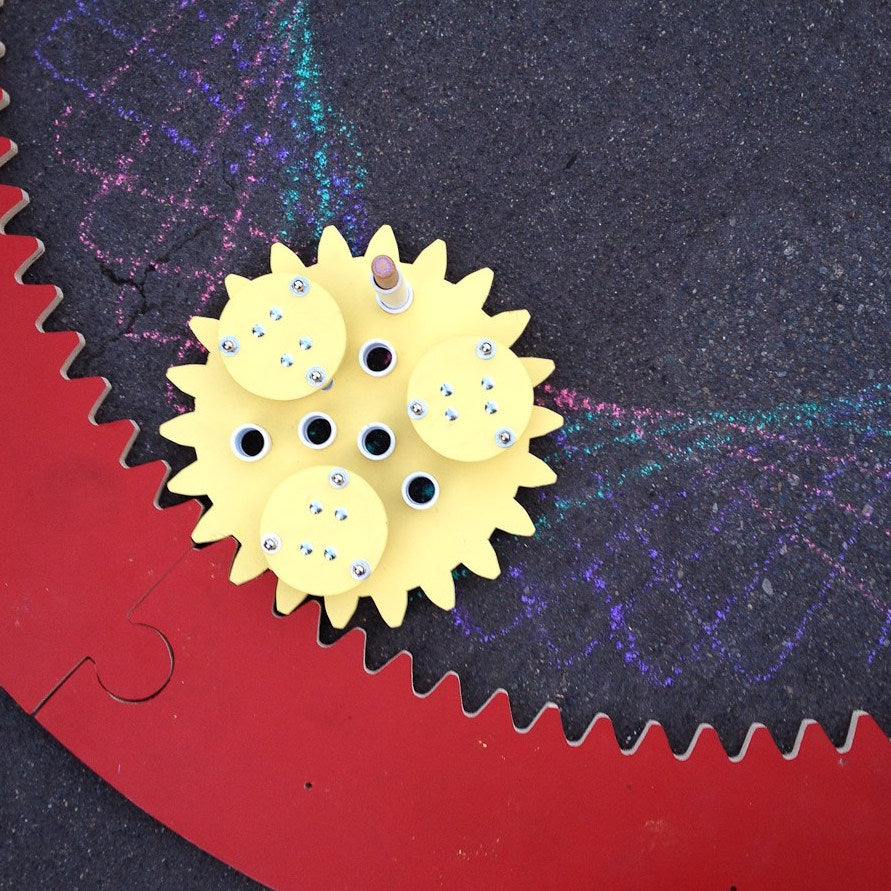
The Giant Spirograph
What’s eight feet across, has 90 teeth, and makes beautiful designs? Not a shark with an art degree, but this giant version of the classic Spirograph drawing toy. Chalk is the medium, and streets and sidewalks are the canvas.