Railroad Crossing

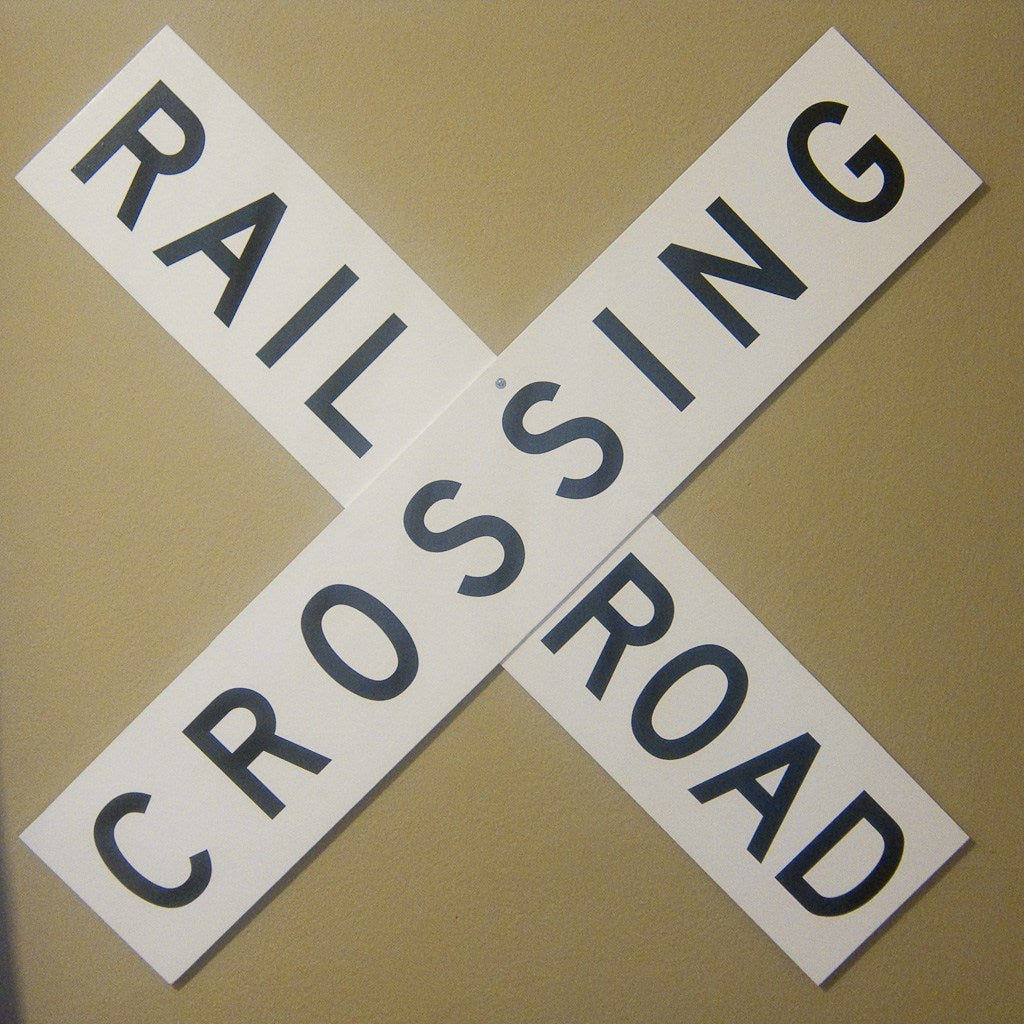
 My two year old son loves, and I mean L-O-V-E-S trains and all things train-related. What could I give him for Christmas that was a little more special than another Thomas the Tank Engine? After a drive down to the train station with him to watch some freights go by, it hitme — a railroad crossing sign to hang on his wall!

It turns out that the regulation size for those signs is 9″ x 48″, crossed in the middle. Conveniently enough, 48″ is one dimension of a sheet of plywood. The other dimension is 8 feet, but I didn’t need to make 10 crossbars. Many lumber stores, including the big box ones, sell 1/4 sheets of plywood — 2′ x 4′ — which are a lot easier to get into the car. I went with one of those quarter sheets in 1/4″ thickness.
I’ve got the tools to cut these to size myself, but they may be willing to do so at the store. Just ask for two 9″ x 48″ pieces to be cut from it. Then head over to the paint aisle and pick up some semi-gloss white paint. I prefer something water-based for easier cleanup and fewer noxious fumes. Put on a few coats and give it time to really dry.
Now it’s math time. We need the two arms to cross at 90 degrees in the center. Measure the length and width of your crosspieces. Don’t assume they’re exactly 9″ x 48″. Subtract the width from the length: 39″ if the measurements are exact. Divide that by two to get 19.5″. This is the length from the end of a crosspiece to the edge of the arm crossing it. Make a light mark on each one, then align the marks in a corner. If you’ve got a square, use that to make sure the pieces are truly at right angles. Look good? Now take it apart, put some glue between the pieces, and put it back together again, lining everything up one more time. Clamp the pieces together or stack some heavy books on them, and let it dry according to the instructions for your glue.
But what about the letters, you’re asking. I’m all about authenticity, so it wouldn’t work to just hand paint on any old letters. I needed the actual font for the sign, and Google didn’t let me down. After downloading the font, I layed out the spacing in Adobe Illustrator and converted the characters to the outlines needed for cutting vinyl.

Peeling the backing from the letters.
I got in touch with Teresa at Custom Vinyl Signs — we’ve worked on other projects together before — and she was able to cut the letters from black vinyl. I’ve attached the EPS file with the layout of the letters that she or almost any other vinyl cutter would need. The great thing is that everything is already spaced and aligned on a backing paper, so there’s no need to align individual letters on the sign.
Now study some pictures of real signs. You want to make sure everything is going in the right direction. “Railroad” is on the back crosspiece, and goes from upper-left to lower-right. “Crossing” is on the front piece, going from lower-left to upper-right.
After some careful placement and quadruple-checking of measurements, peel the backing and press those letters down. Get it right, because once they’re down, they’re down.
That’s it, you’re done!

The finished sign hanging on the wall.
Approximate costs:
| 2’x4′ sheet of 1/4″ plywood: | $7.00 |
| Quart of white paint: | $7.00 |
| Vinyl letters | $14.00 |
| TOTAL: | $28.00 |
Add a few more dollars if you need a paintbrush, wood glue, etc., but the whole thing should still easily be under $40.
Leave a comment
Comments will be approved before showing up.
Also in Projects

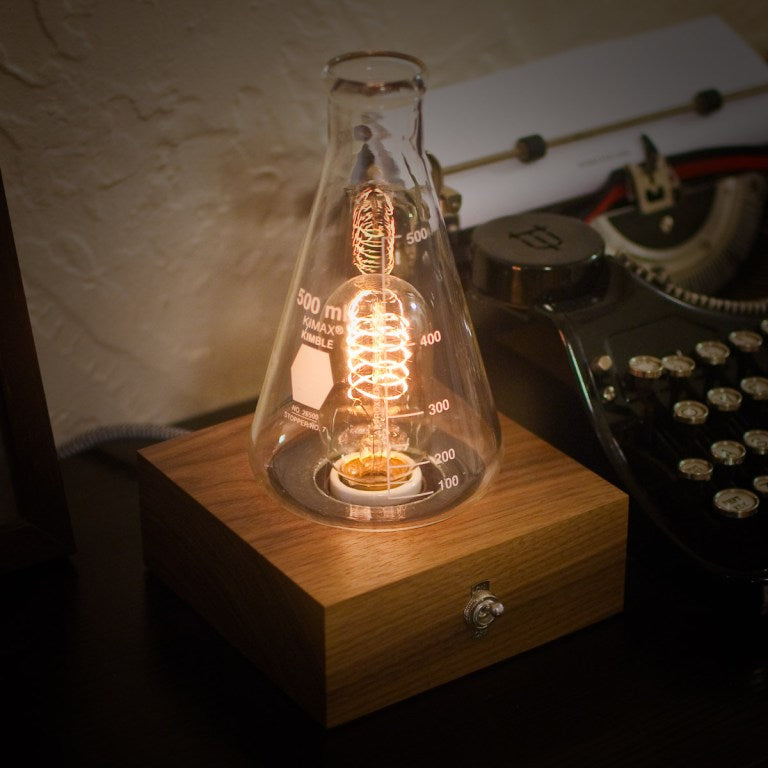
The Laboratory Lamp
First created in 1860, the Erlenmeyer flask has come to symbolize chemistry, and by extension science as a whole. I wanted to use that symbol to create an item of functional decor, and what better for that than a lamp, with the relationship between the light bulb and the “aha!” of an idea?

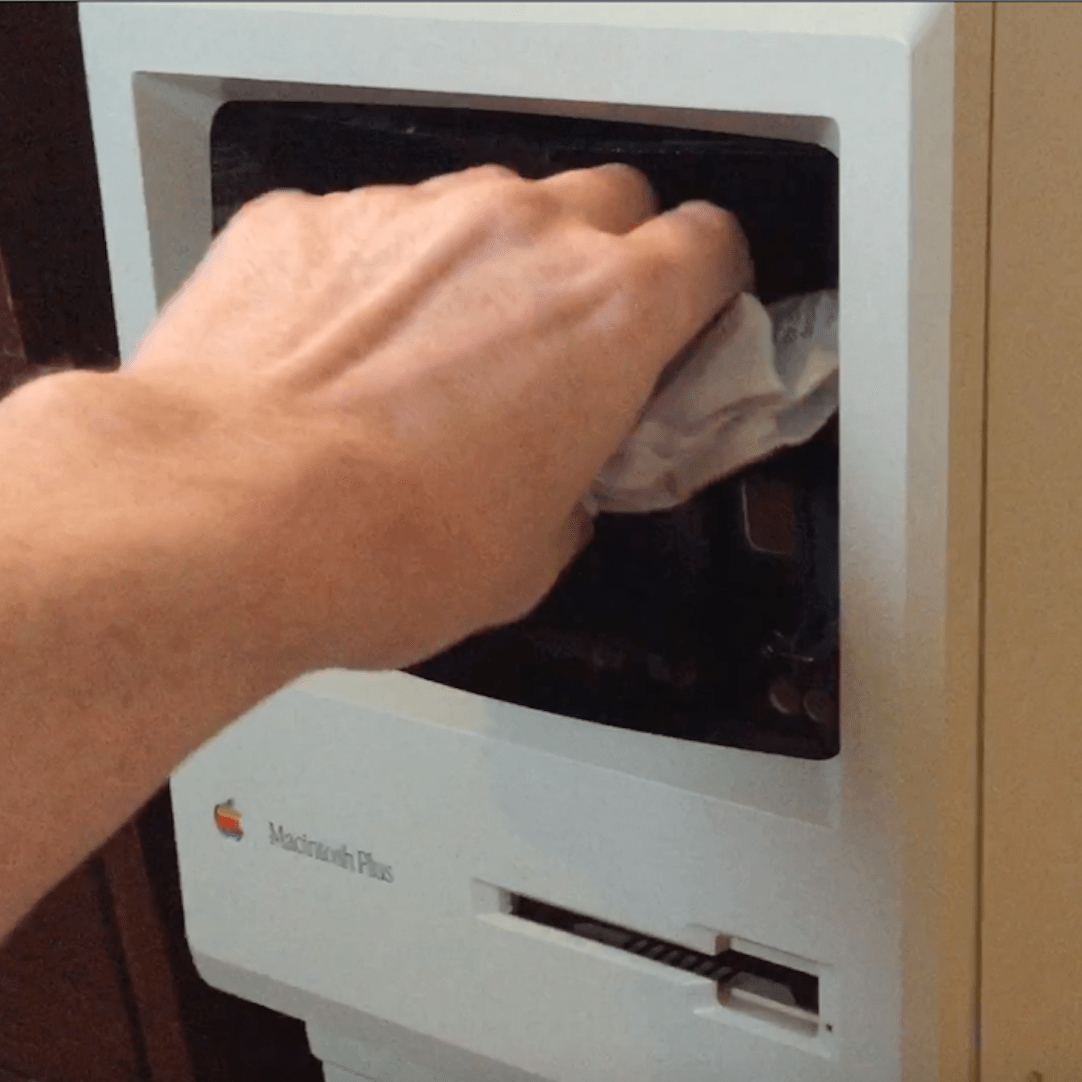
Garbage In, Garbage Out
For over a decade I’ve had kicking around in my garage’s attic the cases from a couple of old original-style Macintoshes, waiting for just the right project.
One day, after staring at them stacked in my office, I realized that they had a similar form factor to the classic bullet-top garbage cans with the swinging lid. I could give one of these a new (slightly unceremonious) life as a garbage can!

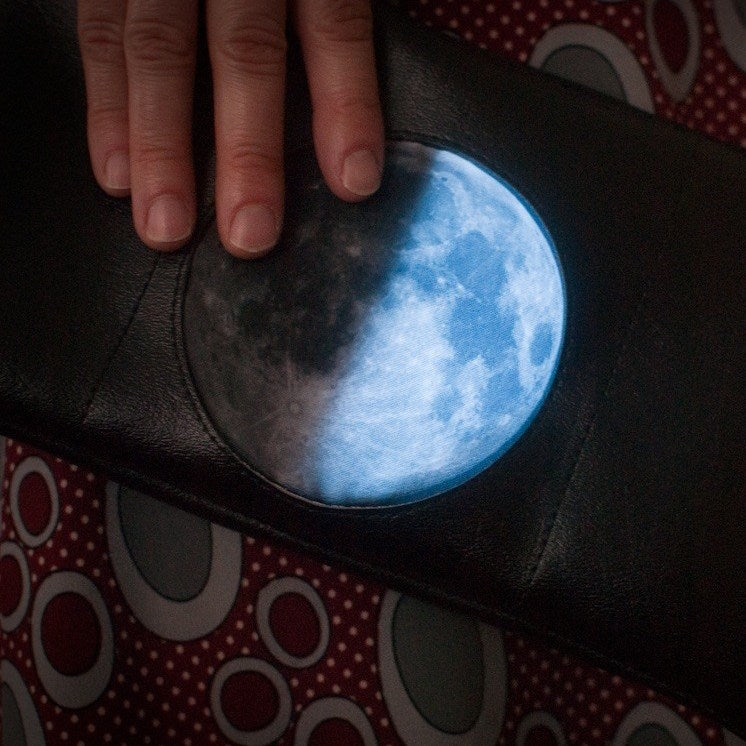
Moon Phase Purse
I’ve been going through a moon phase recently (pun absolutely intended), and thought it would be fun to make a wearable or totable that displayed the current state of the moon. There would be a bit of hardware involved, so a purse seemed like the perfect vehicle—you’re already carrying a load of other things, so there’s no harm in the addition of a small battery pack or a pile of LEDs.