USB Mix Tape

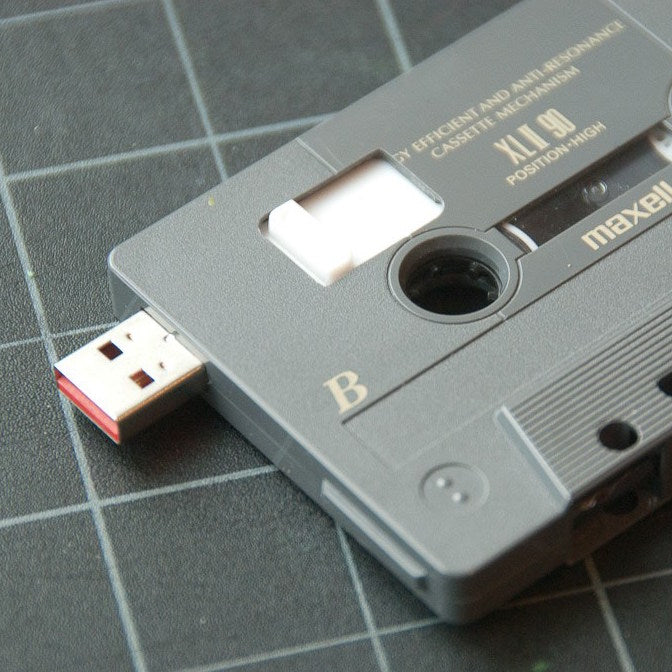
I was reminiscing with friends about the days of mix tapes when it struck me that the ubiquitous USB flash drive would fit almost perfectly into a cassette tape, making a perfect marriage of old and new media. You could have all of the artwork and label design potential of the tape (to say nothing of the nostalgia), but with the space for more than just a dozen songs.
A quick survey online found some instructions on making your own or even buying pre-made ones. Ignoring all, I plunged ahead. After all, this is about learning, building, and probably screwing up, not just having a finished product.
I found a cheap, unopened cassette tape at a local surplus store, but it turned out to not have the screw-joined halves I thought it would. I was going to have to raid my old stash of tapes from the corner of the basement. I haven’t listened to a tape in at least a decade, don’t even have a tape player, and certainly don’t still have the old Yamaha multitrack recorder these were recorded with, but I still had a tough time sacrificing it. Why, there could be a heartfelt masterpiece on that tape that 22-year-old me recorded. Someday the archivists (or prison psychologists) will want to study it!
Oh well. Onward! I at least chose one without a label, on the theory that if I hadn’t thought it worthy of labeling back then, it couldn’t be that important. Now we’ll never know.
With tape in hand, I needed a flash drive. I had a few laying around, so after disassembling the tape to see just how much room there was inside, I spent an hour or so trying out different drives for fit. I wanted the tape to retain its original profile, but I wasn’t sure whether the USB drive should slide out, swivel on this axis or another, or just present a port that would require a separate cable. The drive that seemed most promising was a 2GB SanDisk Cruzer and its sliding action; it would require the least modification to the tape and would be the strongest.

The donor drive, in and out of its original housing.
On a side note, I’m amazed by the fact that I live in a world where it’s hard to find a cassette tape, but I’ve got multiple gigabyte+ storage options buried in my junk drawer. I remember when these cassette tapes used to be the storage for my computer. Three cheers for progress!
With a 3/16″ end mill I milled the port for the USB connector to slide in and out of. Then, after measuring and re-measuring more times than I can count and mapping out the exact numbers of turns and even which direction to turn the handles on the mini-mill (I’ve only had it for a month, and this was my first project after getting it set up), I plunged the mill into the tape and started cutting the opening for the sliding mechanism. I put the opening on side B of the tape, so that side A would look stock while it was in the case. All the planning worked out well, because when I popped the tape out of the vise, the drive fit perfectly.
Unfortunately, the two halves of the cassette didn’t quite fit together. If the SanDisk folks had made their drive just the smallest fraction of an inch thinner, it would have slid right in for a perfect fit. I was going to have to thin the cassette shell.

The finish is a little rough, but it works. You can see the opening for the slider, the thinning of the case, and the notch that keeps the drive locked into place when it’s all the way out. With side B milled out, I tried to put the two halves of the cassette shell together again. No luck, and side B couldn’t stand to lose any more plastic, so I did the same thinning on side A.
A test fit found everything sliding easily when it was supposed to and locking down when required, so I moved on to the reels next.

As you can see in the photo, the take-up reel got in the way of the memory. I attacked it with the belt sander and ground it down just barely to the inside sprockets, then glued it into place (below). It would have been nice to retain the tape functionality, but it wasn’t to be.

The spool of tape on the other reel was a little bit too large and kept the memory assembly from being able to slide all the way back. I didn’t want to unspool too much and lose the full-tape look, so I experimented with the spare tape I got from the surplus store and put some superglue across half of the reel. The thin glue quickly soaked in and glued the layers of tape solid enough that I was able to cut it right through with an X-Acto knife without it unspooling. The cut was a little rough, but that could be cleaned up. More detrimental was that it would be obvious from looking at the little crusts of dried glue through the tape’s window that it wasn’t quite right. Maybe something useful can be done with this tape-solidifying knowledge later.

So after that I decided it might not be so bad after all to lose the 1/4 inch of tape needed for clearance. Finally, a part of the project my four-year-old could help with: “Take this end and pull until I say stop!”
When our fun was over with, I threaded the tape back around the rollers and through the guides.

I know there are some problems with the tape path in this picture. I realized and corrected after the photo.
At last, I put the two halves in place and screwed them together. I didn’t have any labels for the tape, so I trimmed down an address label and used that, then plugged it in to the computer and reformatted to use the name “Mix Tape” (what else could it be?).
The drive works well on my laptop and in the USB port on my desktop machine’s keyboard, but because of the weight and leverage, I don’t know how it would hold up being unsupported in a port higher up on a desktop machine.

If I’d labeled it when I was 16 it probably would have had more stars, spirals, and other doodles on it than today’s version.
Side A looks just like a standard tape, so much so that if it’s still in the case you’ll only notice the USB on the side if you look closely. I’ve handed it to a couple of friends, saying “I’ve got some music I want to share,” only to have them laugh and complain they had nothing to play it on. They have to be told to take it out and flip it over.
And now I have to go make some for them. That’s the trouble with making cool stuff.


Leave a comment
Comments will be approved before showing up.
Also in Projects

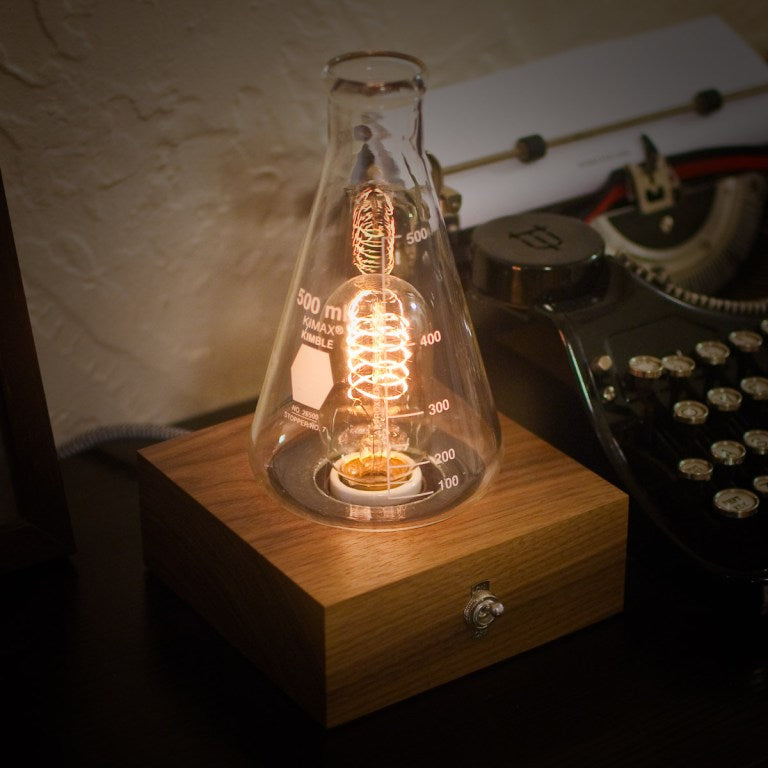
The Laboratory Lamp
First created in 1860, the Erlenmeyer flask has come to symbolize chemistry, and by extension science as a whole. I wanted to use that symbol to create an item of functional decor, and what better for that than a lamp, with the relationship between the light bulb and the “aha!” of an idea?

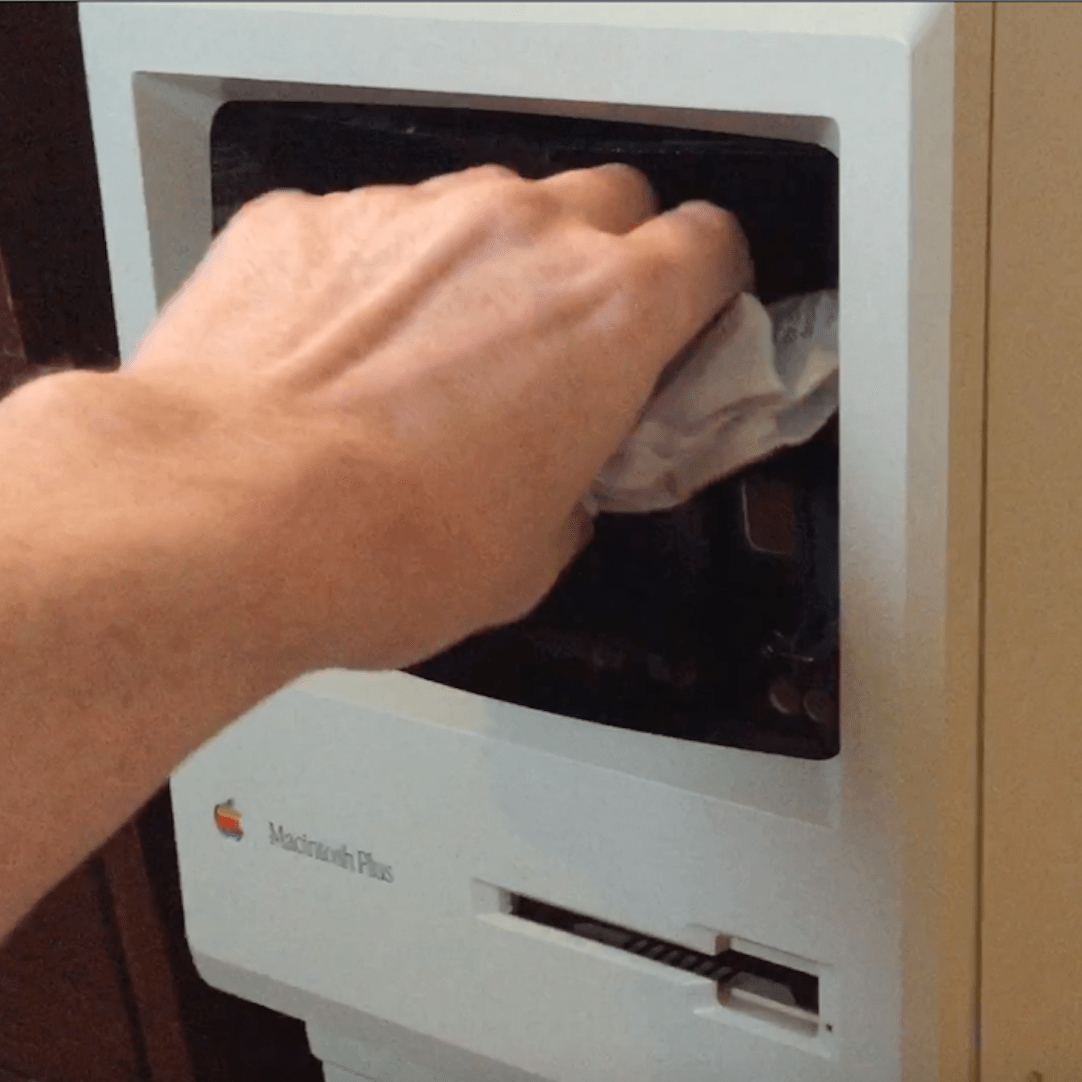
Garbage In, Garbage Out
For over a decade I’ve had kicking around in my garage’s attic the cases from a couple of old original-style Macintoshes, waiting for just the right project.
One day, after staring at them stacked in my office, I realized that they had a similar form factor to the classic bullet-top garbage cans with the swinging lid. I could give one of these a new (slightly unceremonious) life as a garbage can!

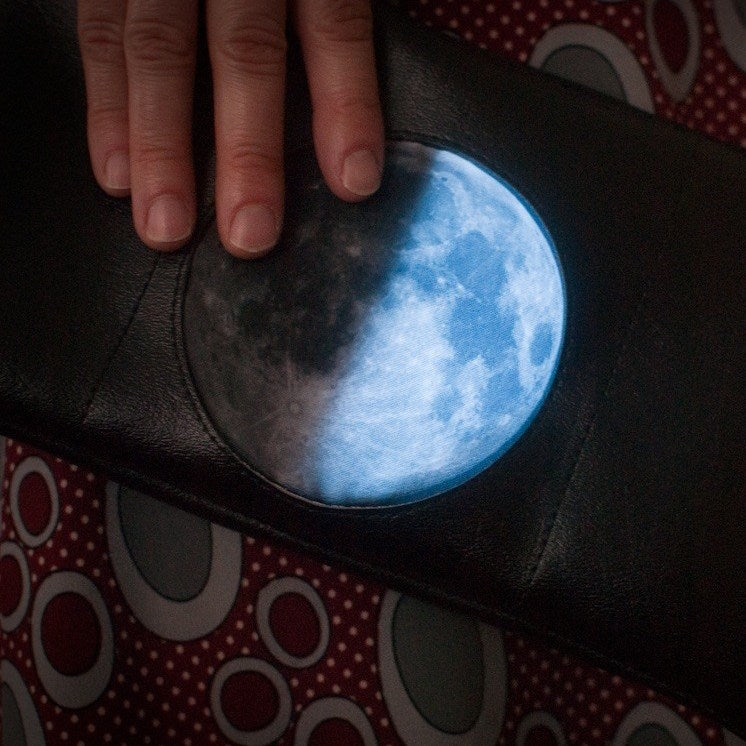
Moon Phase Purse
I’ve been going through a moon phase recently (pun absolutely intended), and thought it would be fun to make a wearable or totable that displayed the current state of the moon. There would be a bit of hardware involved, so a purse seemed like the perfect vehicle—you’re already carrying a load of other things, so there’s no harm in the addition of a small battery pack or a pile of LEDs.